

How To Get Headphones To Work On Pc
Headphones not working / detected in Windows 10 [Easy Fix]
Milan has been enthusiastic about PCs ever since his childhood days, and this led him to take interest in all PC-related technologies. Before joining WindowsReport, he worked as a front-end web developer. Read more
- Sometimes, Windows 10 won't recognize the headphones so check if they are connected properly.
- Headphones might not be detected in Windows 10 because of a problematic driver.
- A simple solution is to update the audio driver by using a dedicated software.
- Disabling the front panel jack detection can also solve this problem so try this fix.
Have you ever connected your headphones ready to tune to your favorite jam, or privately watch a movie, then you got the message Windows 10 won't recognize headphones?
It can be frustrating and annoying. However, there are various solutions to resolving the issue and getting you back on track.
How do I fix headphones if not recognized in Windows 10?
1. Update audio/sound driver
1.1. Update your audio/sound drivers manually
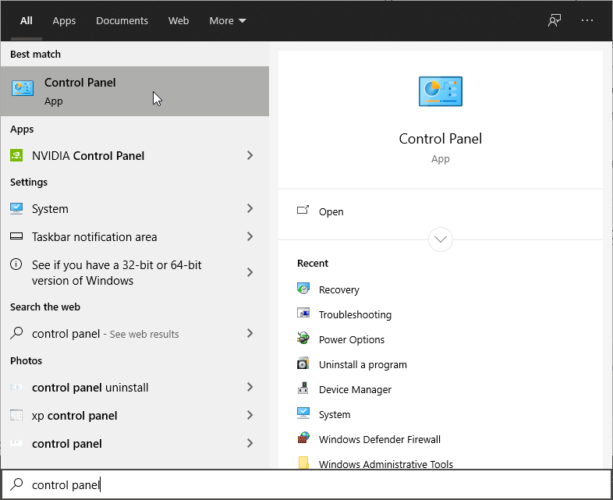
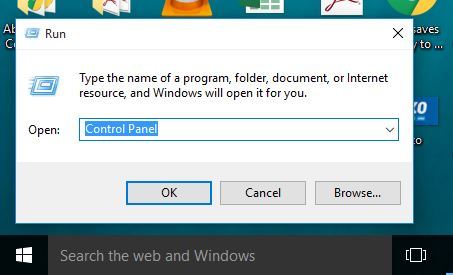
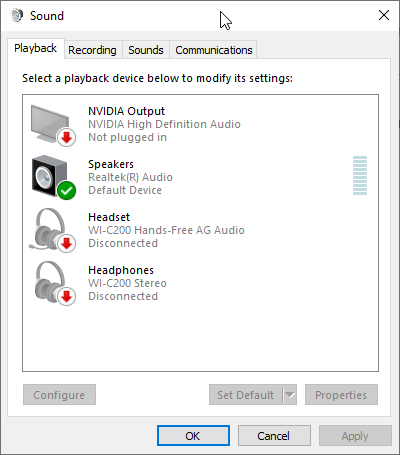
- Type control in Windows search and click on Control Panel from the results.
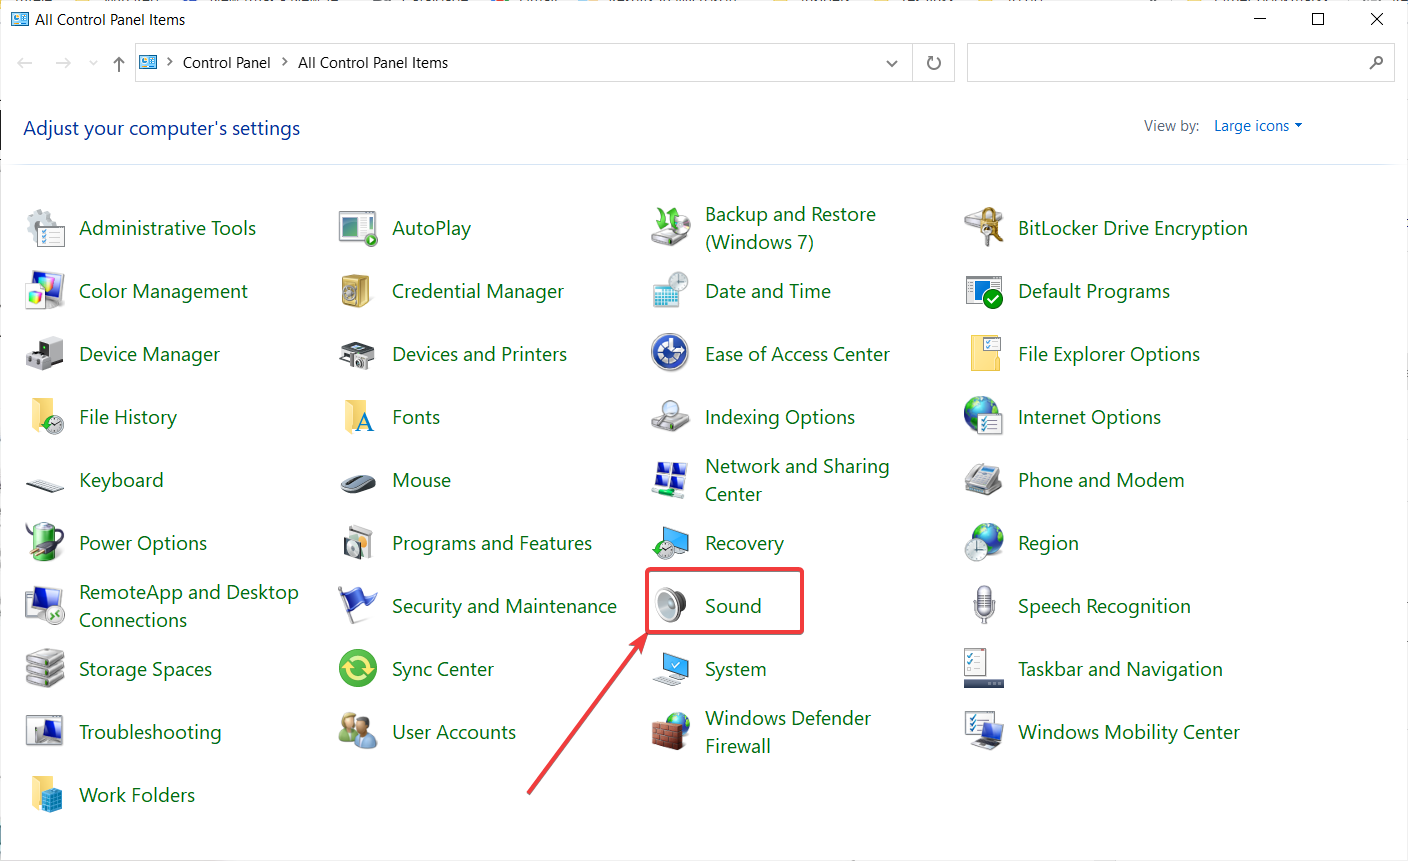
- Click on Sound.
- Go to the Playback tab.
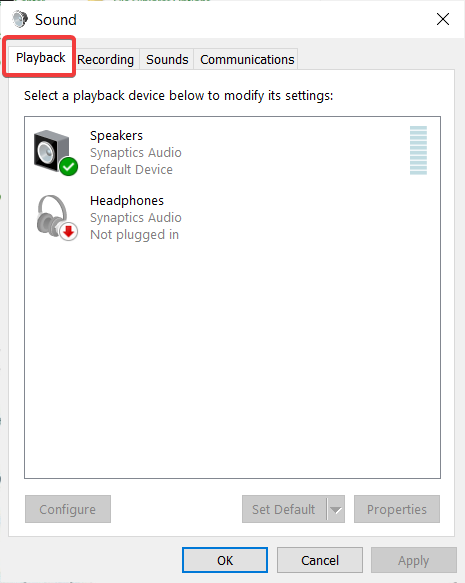
- Select your headphones and click on Properties.
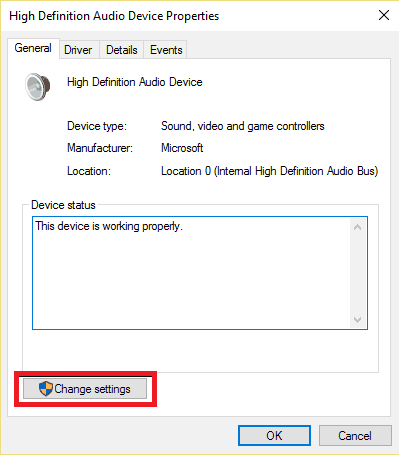
- Go to Controller Information then click on Properties button
- Click Change Settings (this may require administrator permission).
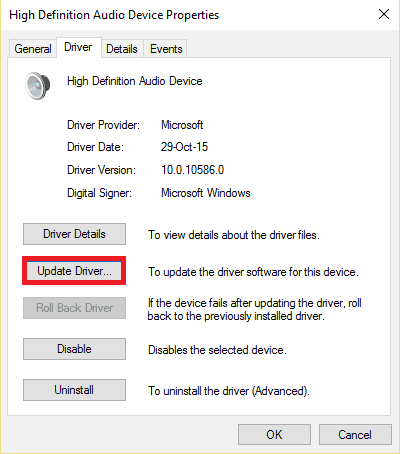
- Go to Driver tab.
- Select Update Driver.
- Let the update download automatically.
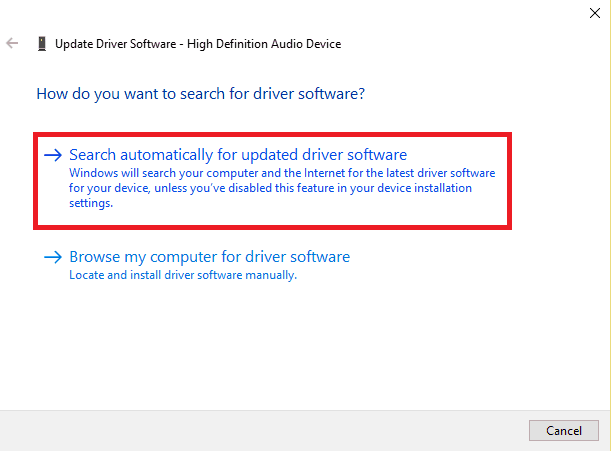
- Once this is complete, plug in your headphones to check whether they'll work.
1.2. Update audio/sound driver using a utility tool
Downloading drivers manually is a process that carries the risk of getting the wrong driver installed, which may lead to serious malfunctions.
The safer and easier way to update drivers on a Windows computer is by using an automatic tool such as the one recommended below.
This tool can get the job done in just a few seconds and clicks because it will repair and update your drivers automatically.
Some of the most common Windows errors and bugs are a result of old or incompatible drivers. The lack of an up-to-date system can lead to lag, system errors or even BSoDs. To avoid these types of problems, you can use an automatic tool that will find, download, and install the right driver version on your Windows PC in just a couple of clicks, and we strongly recommend DriverFix. Here's how to do it:
- Download and install DriverFix.
- Launch the application.
- Wait for DriverFix to detect all your faulty drivers.
- The software will now show you all the drivers that have issues, and you just need to select the ones you'd liked fixed.
- Wait for DriverFix to download and install the newest drivers.
- Restart your PC for the changes to take effect.

DriverFix
Drivers will no longer create any problems if you download and use this powerful software today.
Disclaimer: this program needs to be upgraded from the free version in order to perform some specific actions.
2. Disable front panel jack detection
- Press the Windows key + R to start the Run application.
- Type Control Panel then press enter to open it
- Select Sound.
- Find Realtek HD Audio Manager then click on it
- Go to Connector settings.
- Click Disable front panel jack detection to check the box.
This is one of the simplest ways to resolve the Windows 10 won't recognize headphones issue.
If you have the Realtek software installed on your computer or laptop, follow the steps above to disable the headphone's jack detection.
Try on your headphones again to see whether this solution works for you.
If disabling the front panel jack detection doesn't fix the Windows 10 won't recognize headphones issue, try the next solution.
3. Change default sound format
- Open Control Panel and click on Sound.
- Under Playback, double click on Default Playback device
- Switch to Advanced tab.
- Change the default sound format from the drop-down menu.
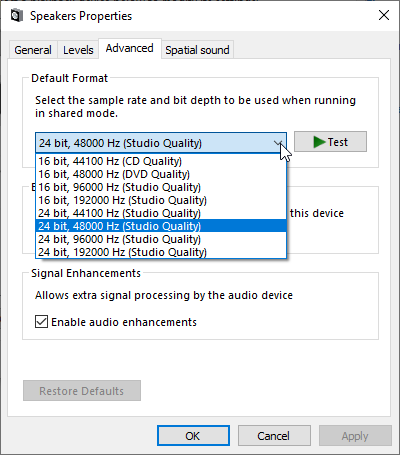
Another reason why your headphones may not be recognized by Windows 10 is the sound format. If this is not set correctly, then you may have the same problem over and over.
Try plugging in your headphones again to check if this solution fixes the Windows 10 won't recognize headphones issue.
4. Set the headphone as a default playback device to fix
- Open Control Panel and click on Sound.
- Under Playback, right-click and select Show Disabled devices.
- From the list of headphones, right-click on your headphone device name.
- Select Enable.
- Click Set as Default.
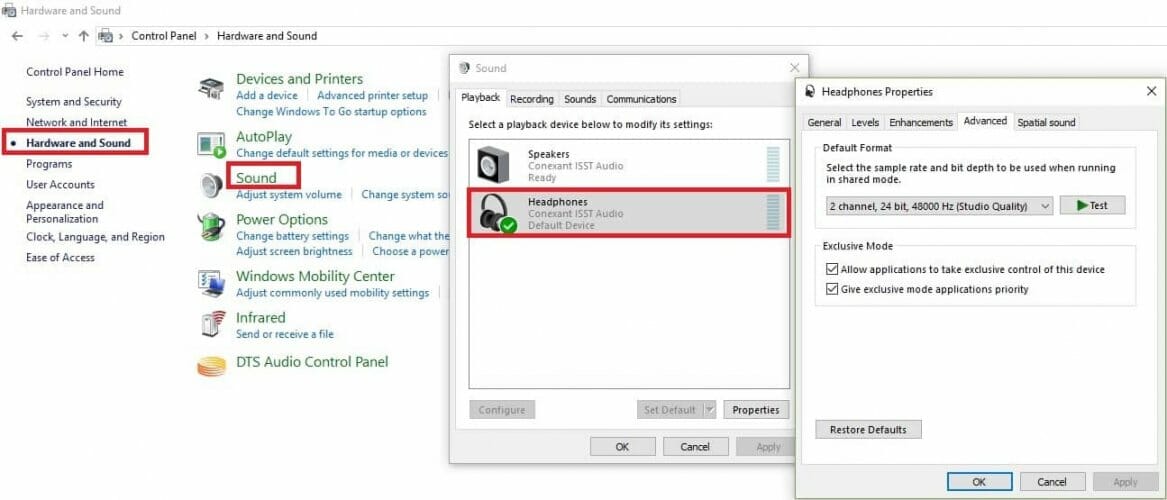
- Click Apply and OK.
If changing the default sound format doesn't work for you, try setting your headphone as the default playback device using the steps above.
Once you follow all these steps, plug in your headphones again and check if they're working.
We hope that these solutions helped you to fix the Windows 10 won't recognize headphones error.
If you've come across other solutions to fix this problem, you can list the troubleshooting steps in the comments below.
Frequently Asked Questions
-
If the headphone jack not working in Windows 10, try to change the default sound format. Read our full guide.
-
Perhaps, your computer doesn't recognize the headphones. Make sure that the headphones are set as enabled and set as Default Device.
![]()
Newsletter
How To Get Headphones To Work On Pc
Source: https://windowsreport.com/windows-10-wont-recognize-headphones/
Posted by: sheleybestione.blogspot.com
0 Response to "How To Get Headphones To Work On Pc"
Post a Comment