how to delete selection in photoshop
This article will show you how to remove the selection in Photoshop extremely simply to remove excess details in the image to create perfect photos.
Surely among us, all of us have encountered the case of taking pictures of ourselves but getting stuck on people, objects and unnecessary details. That makes the image messy and the viewer cannot focus on the main subject in the image. Adobe Photoshop has a useful function to help you solve this problem, which is to delete the selection. Here is a simple and quick way to delete selections in Photoshop on your computer , helping you to have perfect photos.
1. Erase the selection in Photoshop with the Content - Aware Fill tool
Step 1: Go to File> Open to open the image to edit. Then make a selection on the object or detail you want to remove.
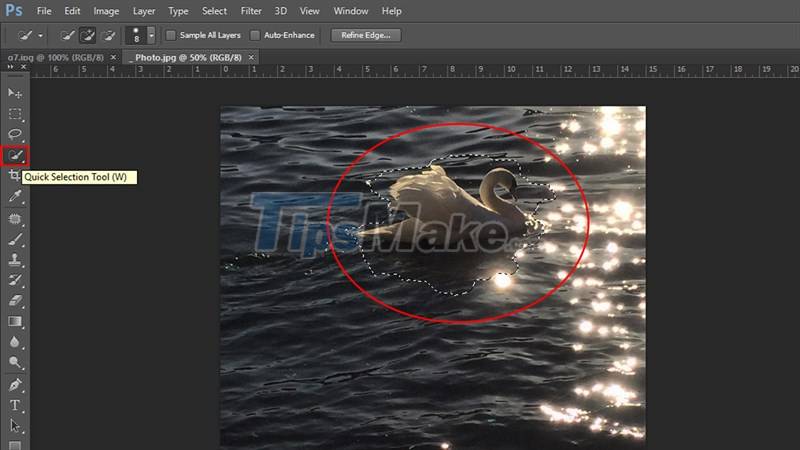
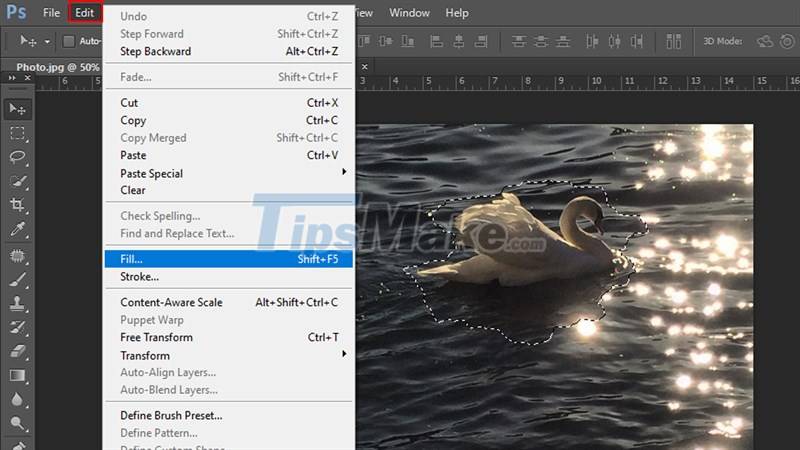
Step 2: After creating a selection, go to the Edit > Fill menu or press the keyboard shortcut Shift + F5 .
Step 3: After the Content - Aware Fill tool panel appears, adjust the parameters as shown below:
- Use: Content - Aware
- Blending Mode: Normal
- Blending Opacity: 100%
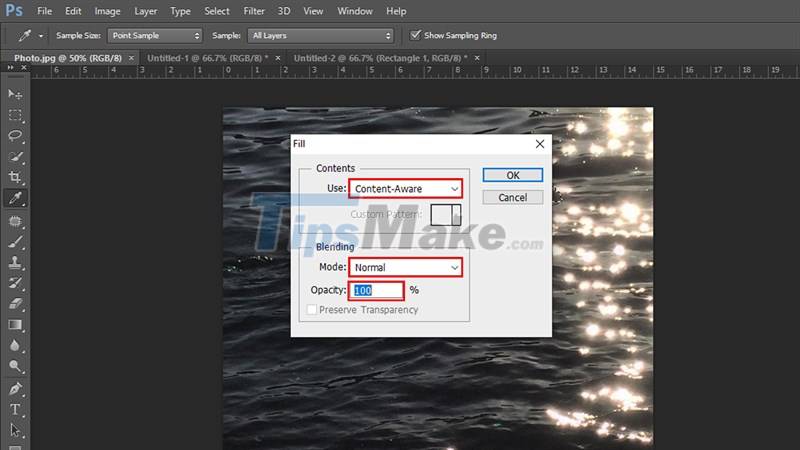
Click OK to complete.
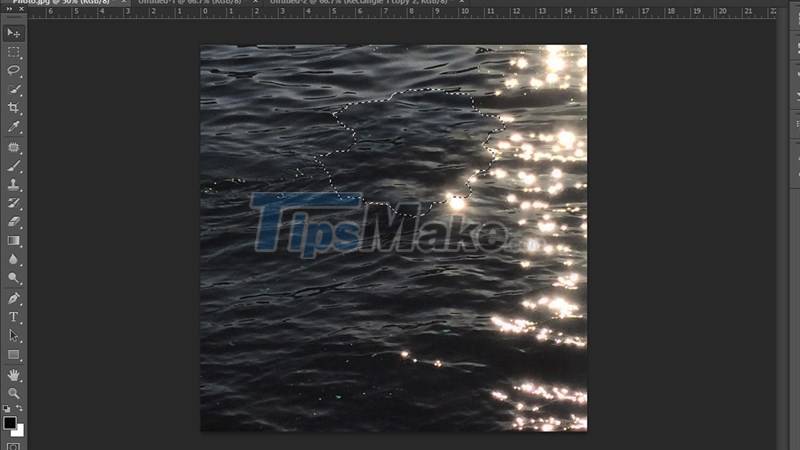
Let's see the difference between the two unedited and edited photos:

This method is extremely easy and fast to do, saves time and is used for objects that have a high degree of similarity with the background of the image such as the sky, fields, . However, this method sometimes when leaving blurred trails when removing objects and requiring high area selection skills for objects with complex structures.
2. Erase the selection in Photoshop with the Patch Tool
Step 1: Use the Patch Tool on the toolbar to select the area or object to be removed.
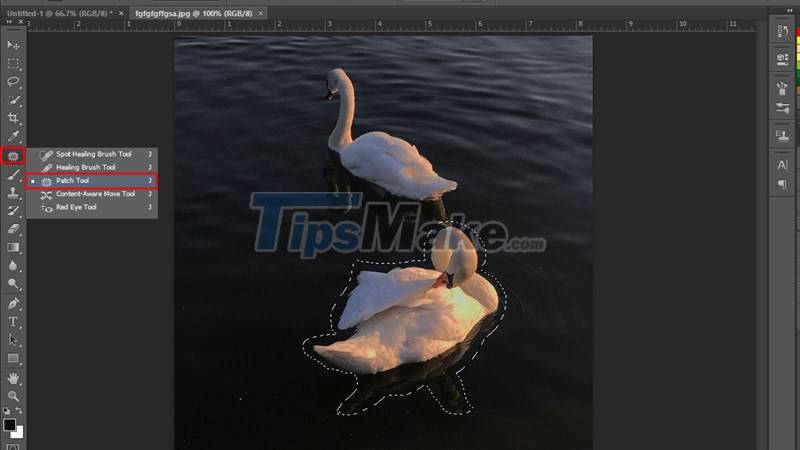
Step 2: Then, hold down the left mouse button to move the selected area of the object to the areas with similar background structure to proceed to delete the redundant area or object. You should hold the mouse and drag and drop several times until the object disappears completely.
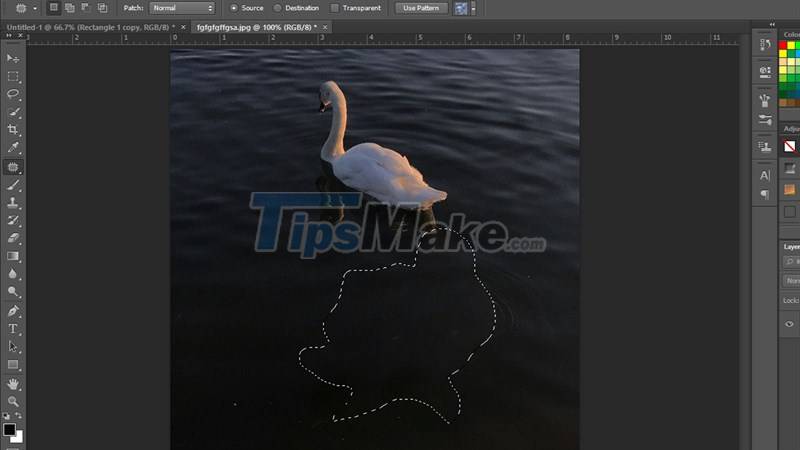
Compare images before and after removing the selection:
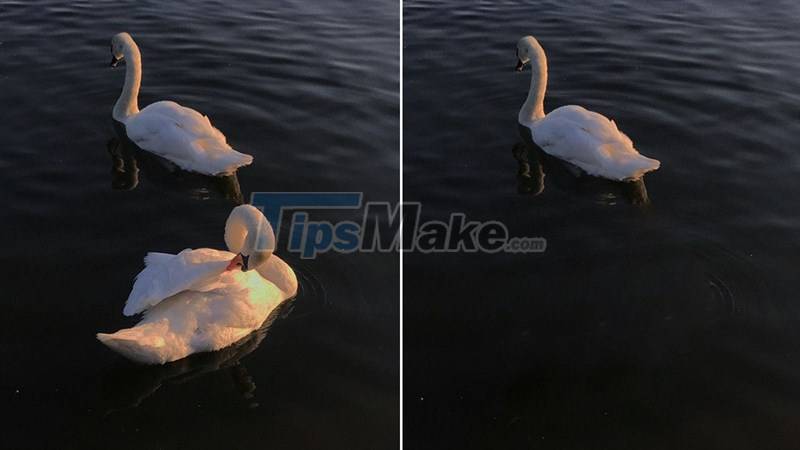
This is also suitable for images with high similarity and for removing small objects or details, avoiding objects with complex structures.
3. Erase the selection in Photoshop with the Clone Stamp Tool
Clone Stamp Tool has the function of repeating beneficial elements to the image, applying those beneficial areas to the areas that need to be removed to make the image more complete.
Step 1: Select the image to edit, then select the Clone Stamp Tool on the toolbar.
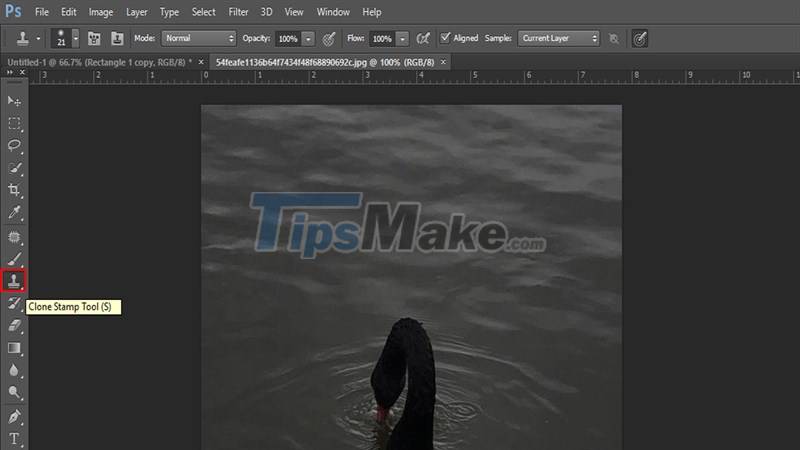
Step 2: Next, right-click on the image to be edited and adjust the parameters in the table:
- Size: The size of the area to be removed.
- Hardness: Thickness or opacity of the border of the area to be removed.
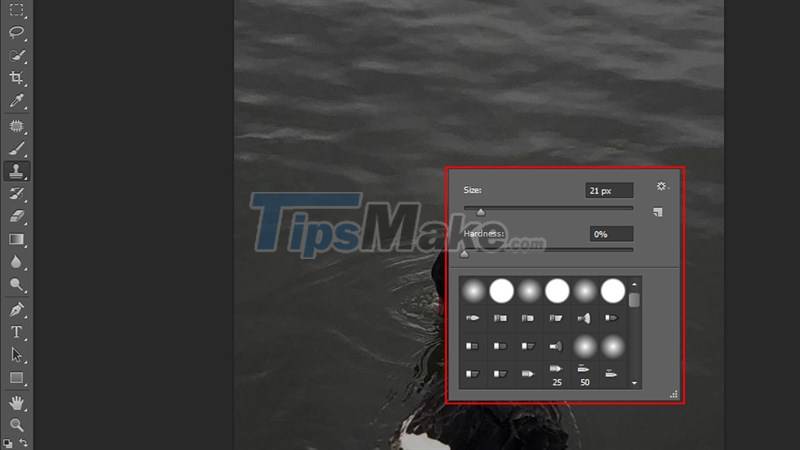
Step 3: This step requires extreme care and meticulousness. All you need to do is hold the Alt key on the keyboard and click on the areas of the image that are beautiful and quite compatible with the area to be removed to copy those areas. Next, click on the areas you want to delete, now those areas will be filled with areas that are beneficial to the image you copied earlier. You can repeat these two operations alternately until you get the desired result.
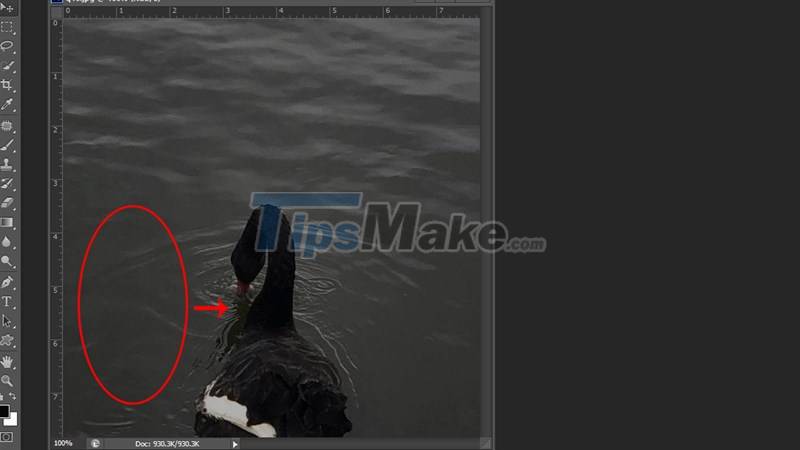
Compare the result and the original image:

This method can overcome the shortcomings of the two methods above that can be used for areas or objects with complex structures and not similar to the image background. However, Clone Stamp Tool requires high technicality, meticulousness and patience of the user.
In a nutshell, through this article, I have shown you 3 different ways to delete selections in Photoshop. Depending on the structure of the image and the object, choose for yourself the most suitable and convenient way to create a perfect and neat photo for yourself. Wishing you success.
how to delete selection in photoshop
Source: https://tipsmake.com/steps-to-delete-selections-in-photoshop-are-very-easy-and-effective
Posted by: sheleybestione.blogspot.com

0 Response to "how to delete selection in photoshop"
Post a Comment