

how to add models to sfm
Introduction
These instructions will tell you how to import Source Film Maker (SFM) models into Unity, through Blender.
They are based primarily off the now-dead instructions by Digitalzombie.
Software Requirements
- Unity - download.
- Blender - download. Used to convert 3d models to FBX format.
- Blender Source Tools - download. Used to load decompiled SFM files into Blender.
- BoneFix - download. Optional - used to fix skeletons.
- Crowbar (ZIP Version) - download. Used to decompile SFM files.
- VTFEdit - download. Used to convert VTF textures to PNG.
Installation
Installing Unity & Blender
Install Unity and Blender as normal - the default options should be fine.
Installing Blender Source Tools
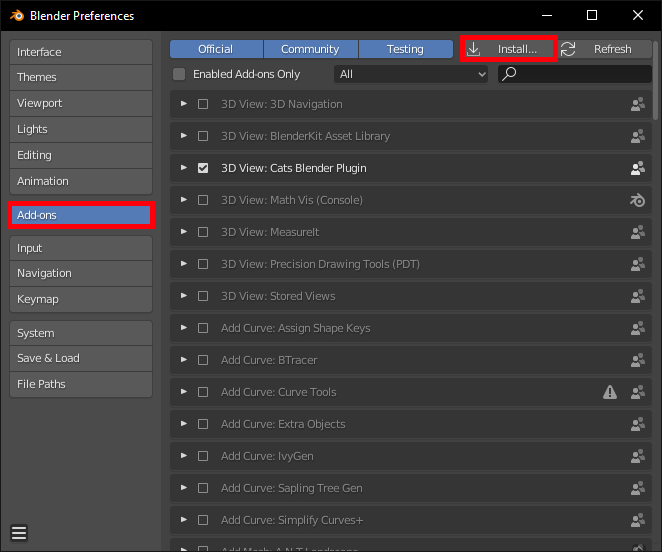
- Load Blender and click on the Edit menu and choose Preferences.
- Click the Add-ons tab then click the Install button.
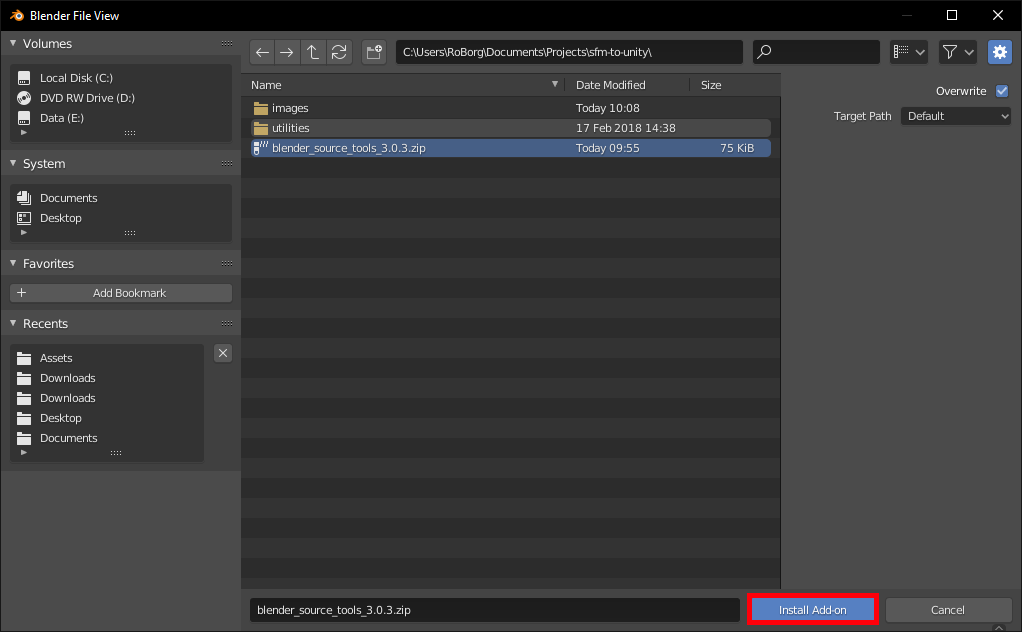
Install an add-on - Locate the blender_source_tools.xxx.zip file you downloaded earlier and click the Install Add-on button.
Select Plugin File - Check the plugin is active by typing "source" into the addon search box, and making sure the checkbox is checked next to Import-Export: Blender Source Tools.
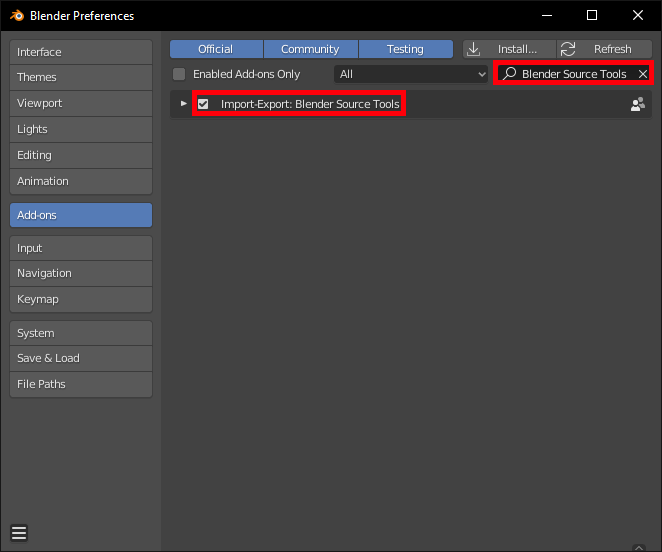
Ensure Plugin is Active
Installing BoneFix
- Create a folder to store the scripts, and move BoneFix.py into it.
- Load Blender and click on the Edit menu and choose Preferences.
- Click the File Paths tab and set the Scripts folder to where you placed BoneFix.py, then click the Save User Settings button.
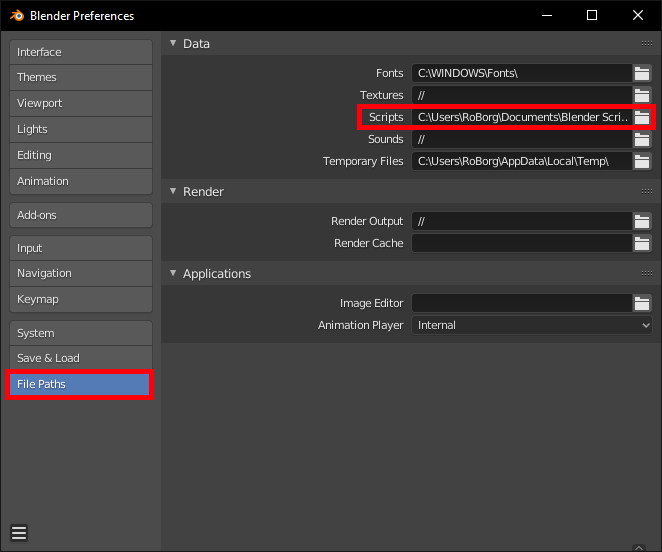
User Scripts Folder
Installing Crowbar & VTFEdit
Extract the each zip file into its own folder.
Convert the Model
Your SFM file will probably be a zip file - extract it and find the folder with the .mdl file you want to use.
Before starting, it's best to create a new folder to store your converted model and textures in.
- Load Crowbar and on the Decompile tab, open your .mdl file.
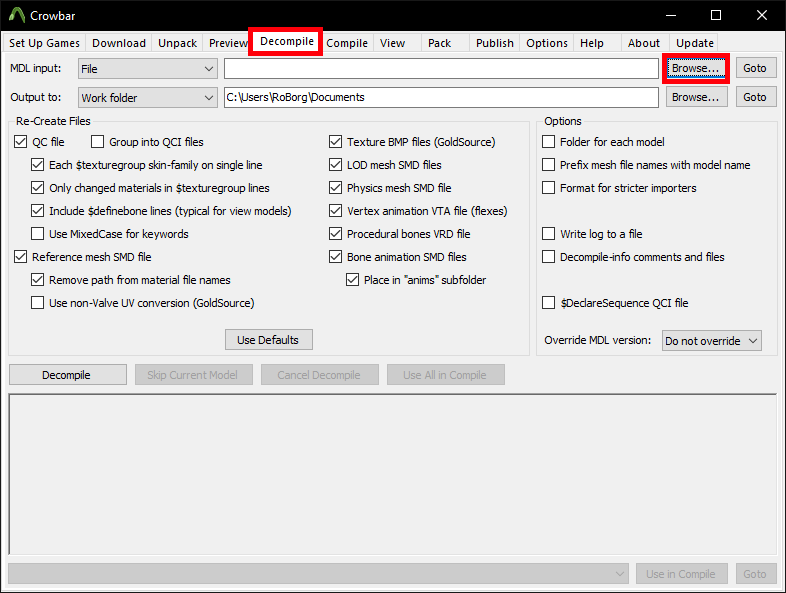
Choose your File - Click the Full path radio button and choose folder you want to put the decompiled files in, then click the Decompile button. You can leave all the options at their default values.
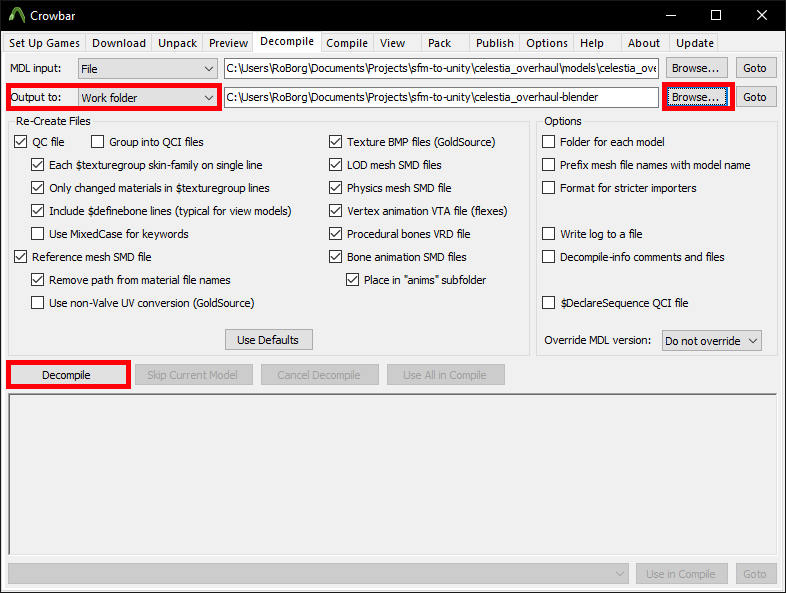
Decompile the Model - When decompilation is complete your model will be ready to import into Blender, but the textures need converting separately.
Convert the Textures
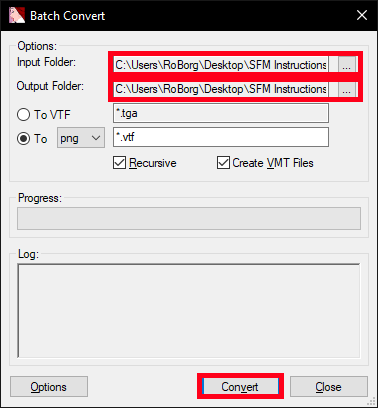
- Open VTFEdit and click the Tools menu then choose Convert Folder.
- Select the input folder that has the .vtf and .vmf files in it. Select an output folder for the .png files - use the folder you created for the decompiled model. Click the Convert button to convert the textures.
Decompile the Textures
Fix the Skeleton (Optional)
This is an optional step - follow it if your model has a skeleton you want to use in Unity
- Click the mode tool and select Object Mode then right-click on any bone to select the skeleton.
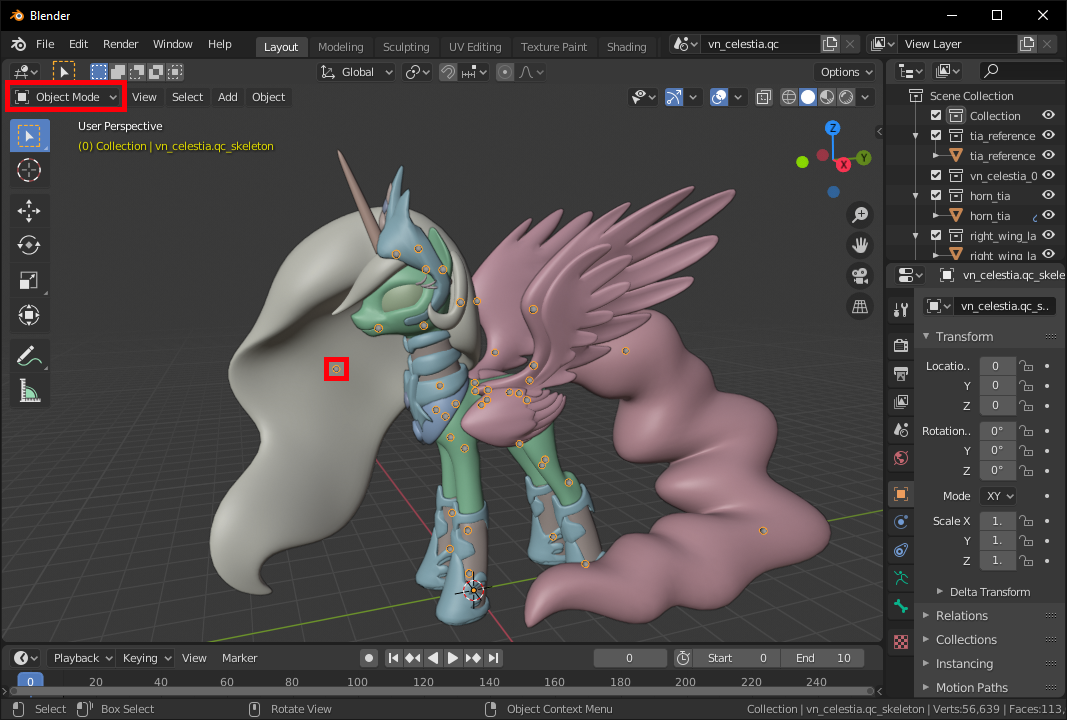
Select the Skeleton - Go to the Python console by clicking the window button and selecting Python Console. Note - this was called Scripts in older versions of Blender.

Go to the Python Console - Run the script using the following code (don't forget to change the script path!):
exec(open("c:\\users\\RoBorg\\Documents\\Blender Scripts\\BoneFix.py").read())If you're using Python 2, you can use this instead:
execfile("c:\\users\\RoBorg\\Documents\\Blender Scripts\\BoneFix.py")
how to add models to sfm
Source: https://roborg.github.io/sfm-to-unity/
Posted by: sheleybestione.blogspot.com
0 Response to "how to add models to sfm"
Post a Comment